Hello
Let me introduce Apgujeong Laminate.
I’ll share a treatment review of no-prep laminate.
This patient came in for no-prep laminate treatment in December 2023.
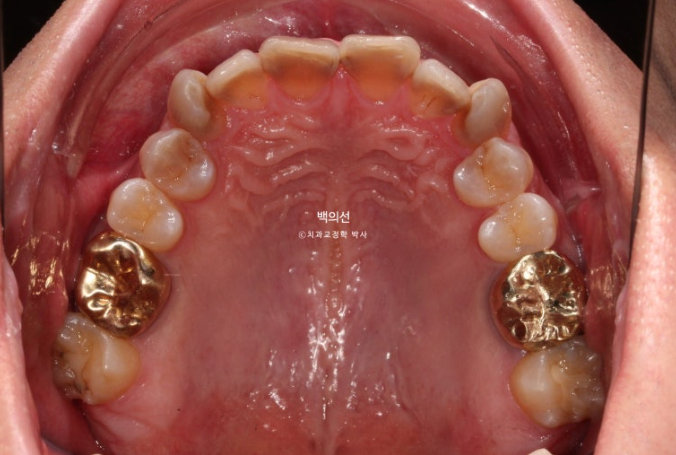
They wanted all teeth, from the canines back to the premolars, both upper 8 and lower 8, covered with laminate.
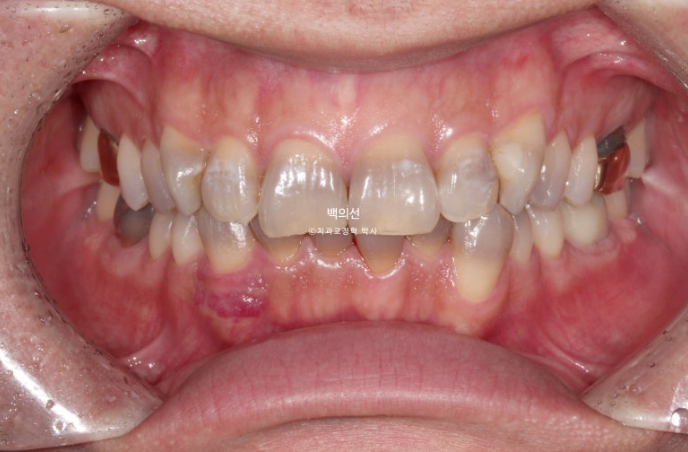
The discoloration is severe, with a fairly deep gray tone.
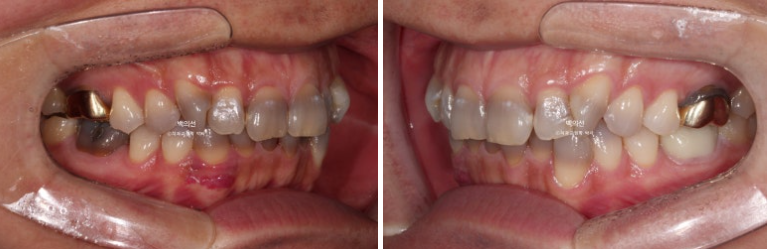
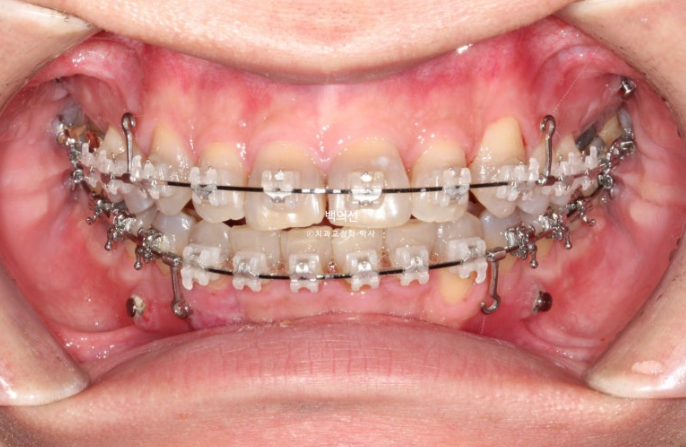
However, as you can see from the front, the canine crowding means laminate treatment would be difficult unless orthodontic treatment is done first.
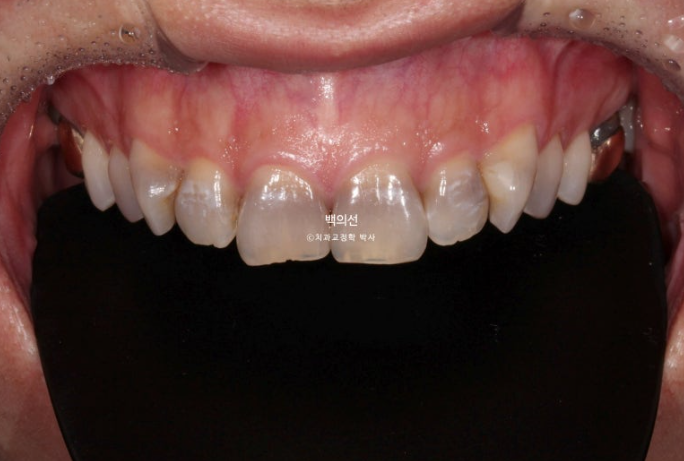
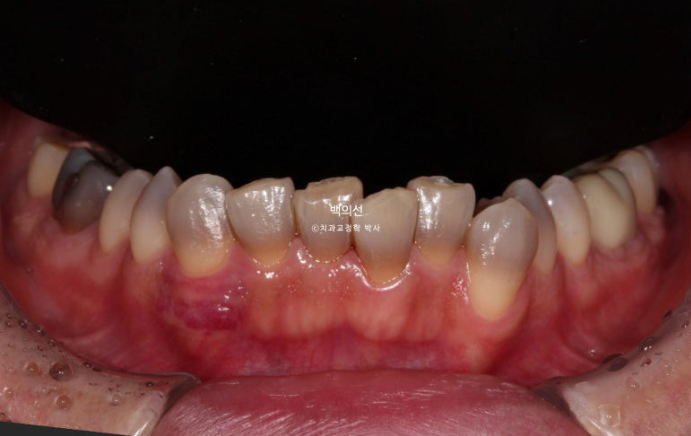
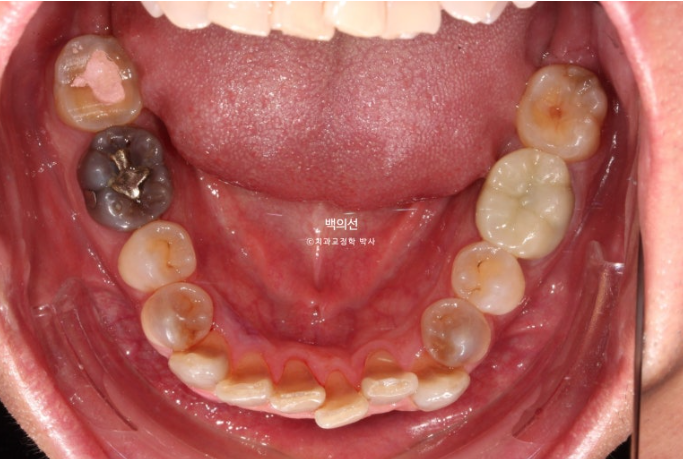
In the lower front teeth, there are varying heights in addition to the canine crowding.
The lower front teeth have stricter conditions for no-prep laminate than the upper front teeth.
Because the laminate has to wrap around the incisal edge of the lower front teeth, there needs to be some distance between the upper front teeth and the lower front teeth.
The canine crowding is fairly severe.
Before the no-prep laminate, we decided to first proceed with non-extraction canine crowding correction using CLIPPY-C.
The space needed to align the crowded teeth was to be obtained by moving the molars backward using the wisdom tooth space.
25.04
For this, four orthodontic mini-screws are needed.
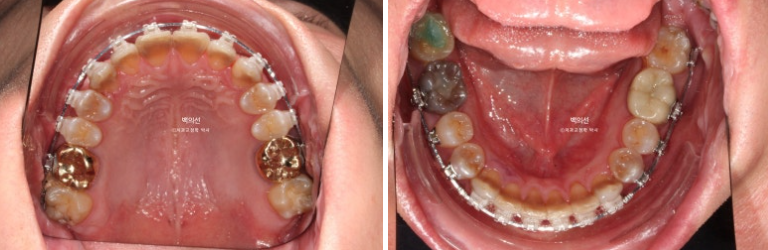
25.04
After 1 year and 4 months since the start of treatment, orthodontic treatment was finally completed.
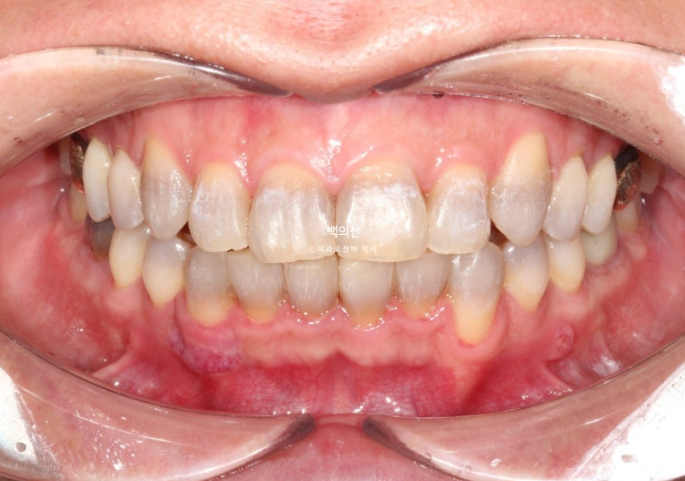
Orthodontic treatment for no-prep laminate is a little different from ordinary orthodontic treatment in terms of results. Since the upper front teeth become slightly longer after the no-prep laminate is placed, the bite on the front teeth is intentionally made shallower.
In addition, for no-prep laminate on the lower front teeth, the space between the back surface of the upper teeth and the incisal edge of the lower front teeth needs to be wide.
Only by finishing with these points in mind can true no-prep laminate treatment be possible.
Now we prepare for fitting.
After fitting, we check the approximate thickness and shape of the teeth, and then begin making Gelami.

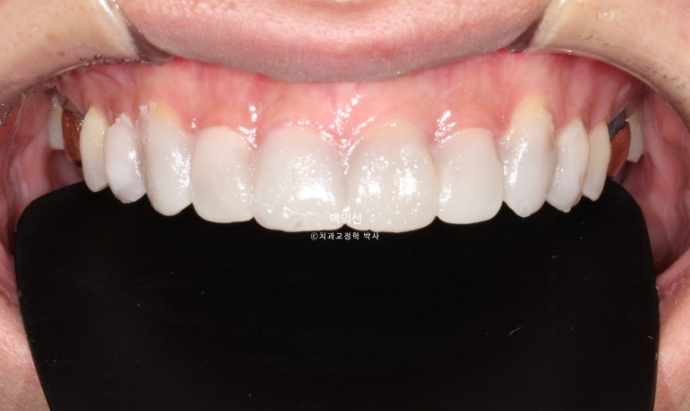
This is what the Gelami looks like on the 8 upper front teeth.
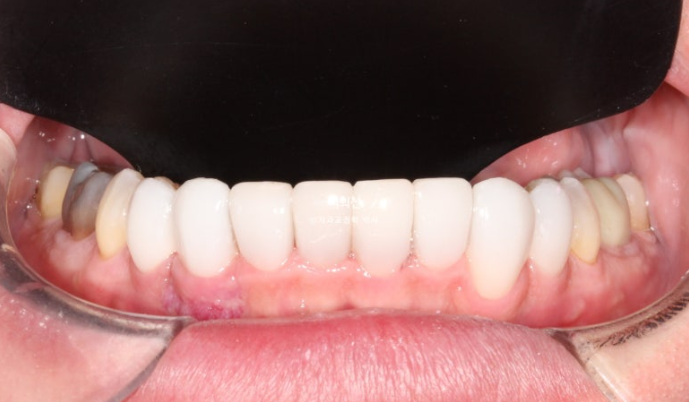
This is what the Gelami looks like on the 8 lower front teeth.
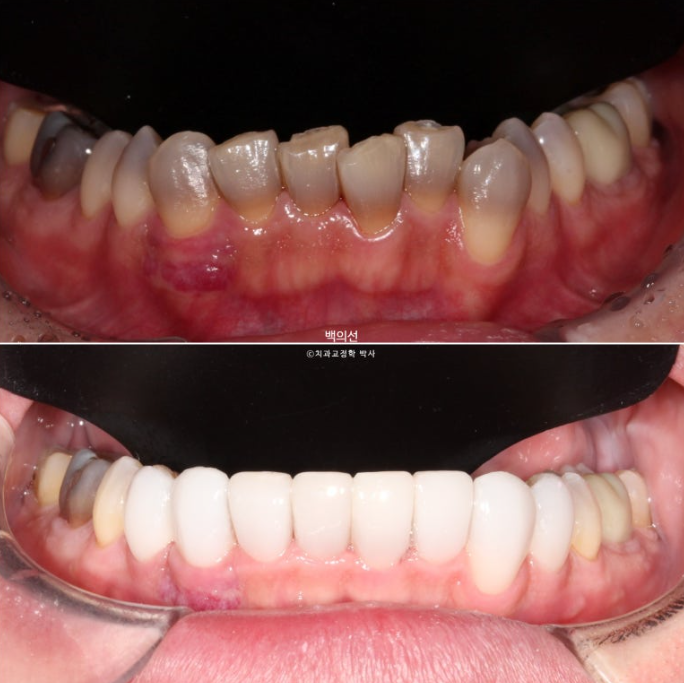
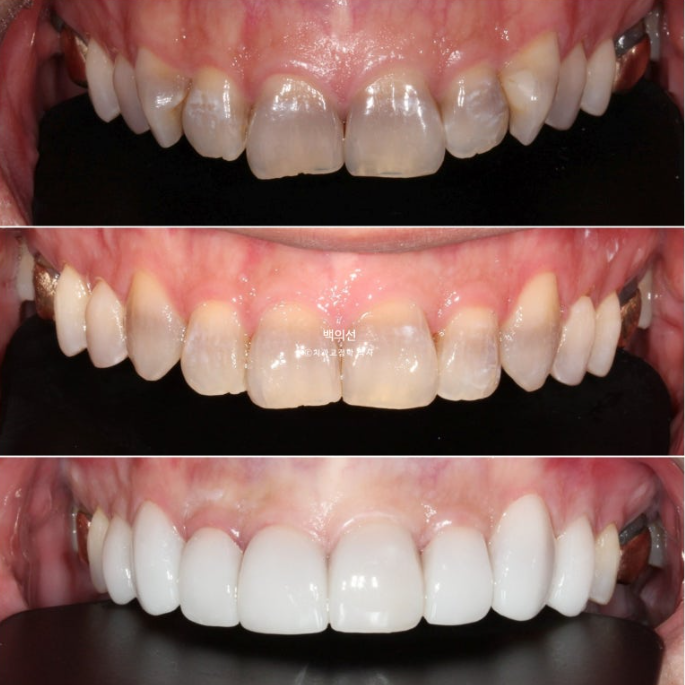
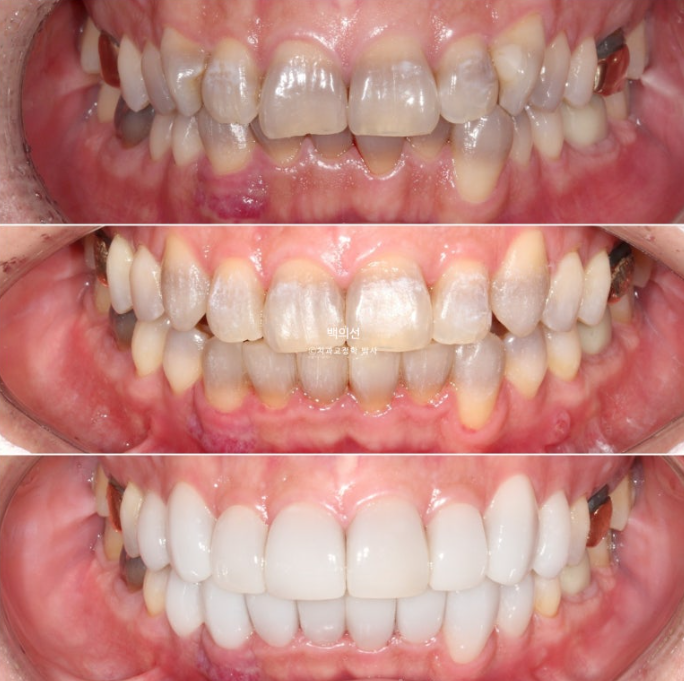
Now let’s compare the initial visit, after orthodontic treatment, and after Gelami in sequence.
23.12~25.06
23.12~25.06
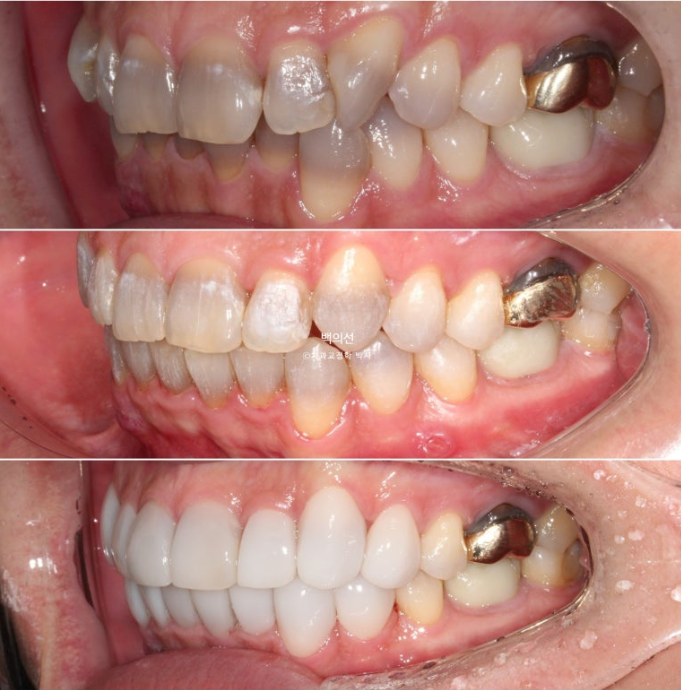
23.12~25.06
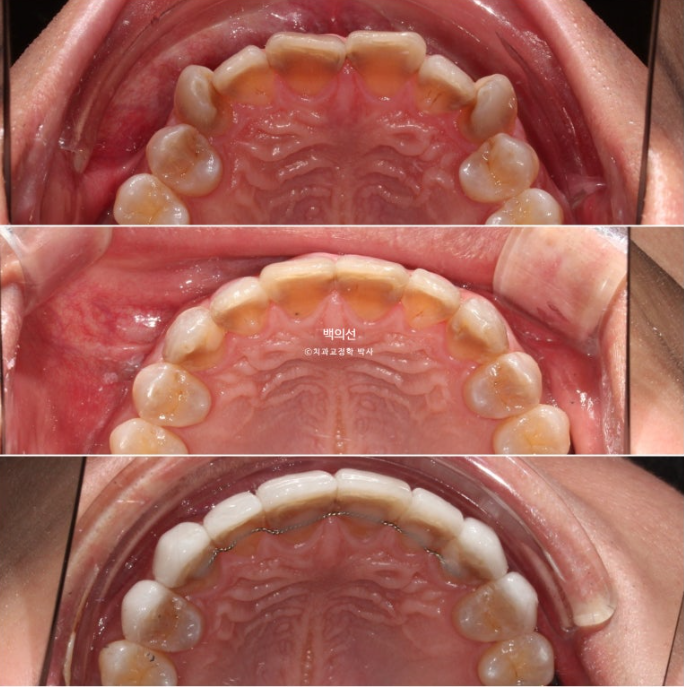
23.12~25.06
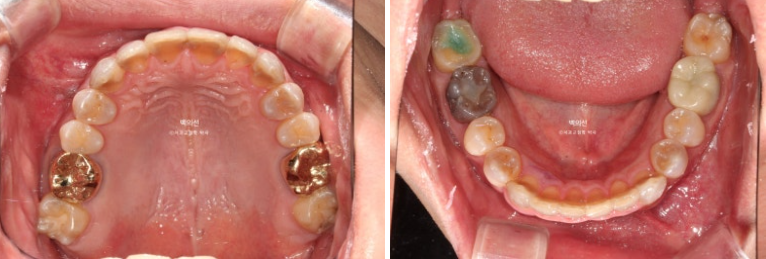
This is an occlusal surface photo that gives an idea of the thickness of Gelami.
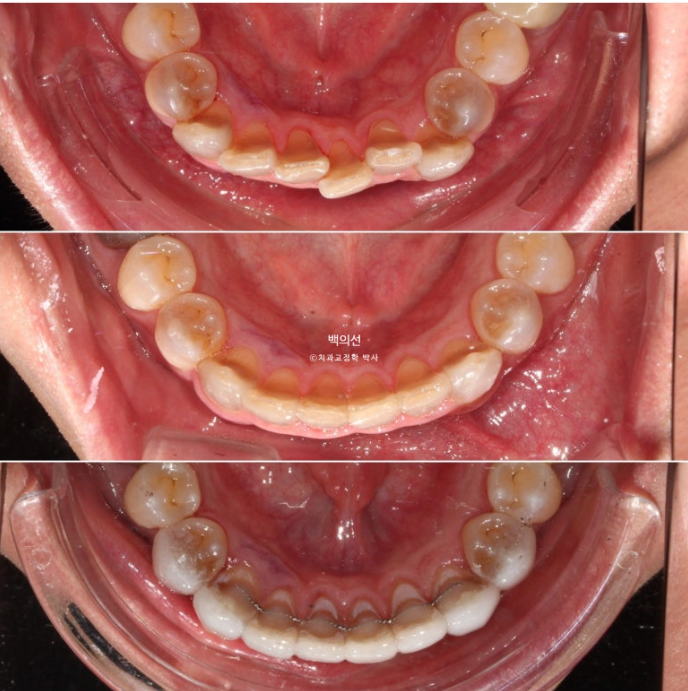
23.12~25.06
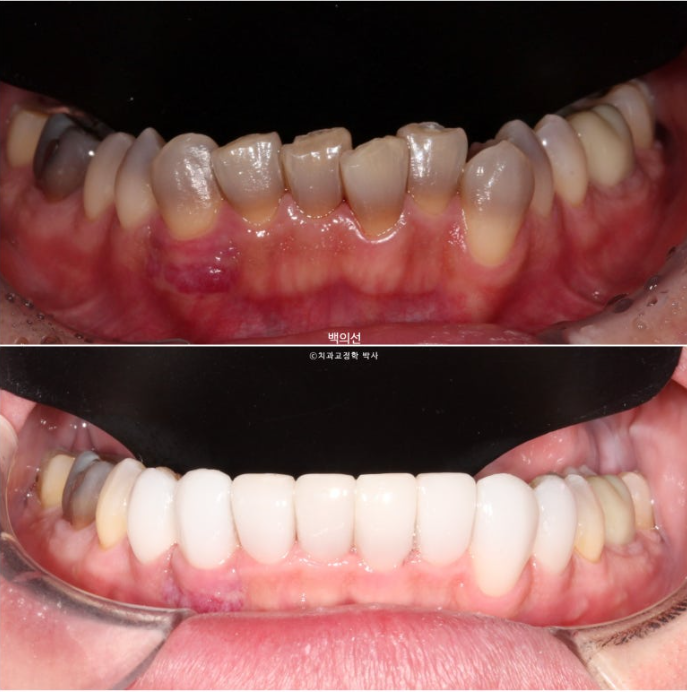
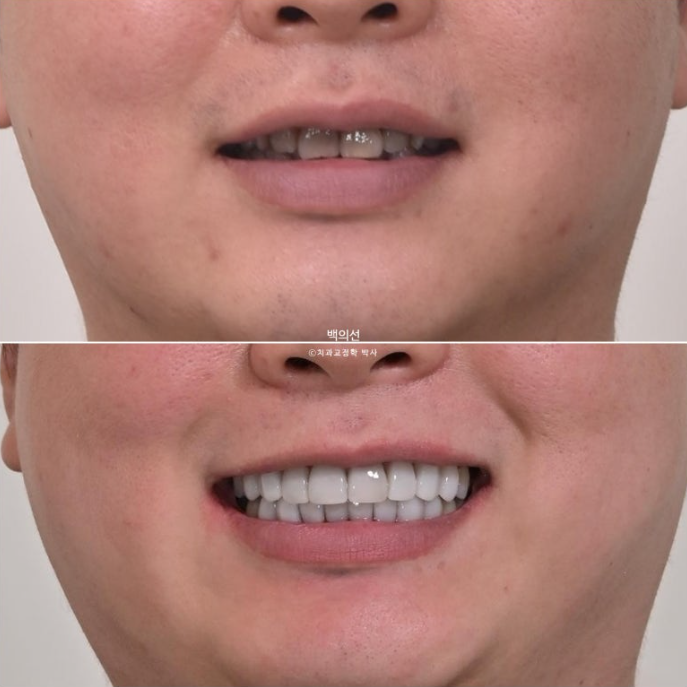
No-prep laminate has to be made thin, so the original tooth color inevitably shows through to some extent. In the facial photo, it can be seen that the original dark gray tooth color is showing through.
The way to prevent this gray tone from showing through is to remove some tooth structure and make the laminate thicker.
However, the patient wanted a no-prep approach, so we decided to accept some degree of gray tone.
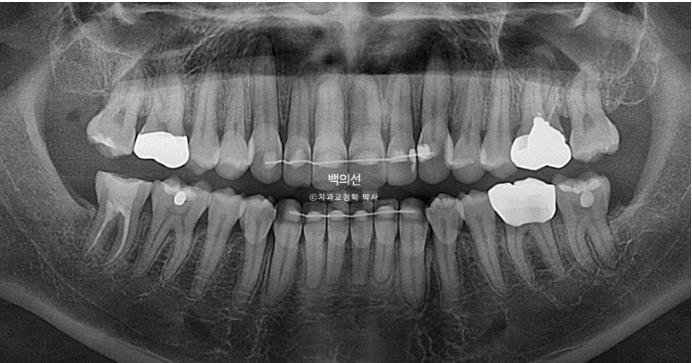
The orthodontic result shows good root parallelism.
I hope this post is helpful for those considering treatment for tetracycline-stained teeth.