Hello,
I’m dentist Yeo Sang-ho from Maggok Station Dental Clinic.
Many people feel aesthetically dissatisfied when the color of their front teeth is uneven or their alignment is irregular.
In particular, orthodontic treatment can feel burdensome because of the time and maintenance involved, and full crowns can be hard to choose because they require a lot of tooth reduction.
Today, through example photos, I’ll go step by step through the laminate process that improves the shape and shade of front teeth with minimal tooth reduction 😊
- What is laminate?
This article was written by Maggok Station Dental Clinic for the purpose of providing medical information.
As a type of esthetic prosthetic restoration,
it involves lightly removing only part of the enamel on the front teeth,
then attaching a porcelain-based restoration that suits the patient’s facial shape and oral environment,
recreating everything naturally from color to form.
It is mainly used when front teeth are stained,
when whitening does not solve the problem,
or for areas with minor cracks or decay.
- Examination
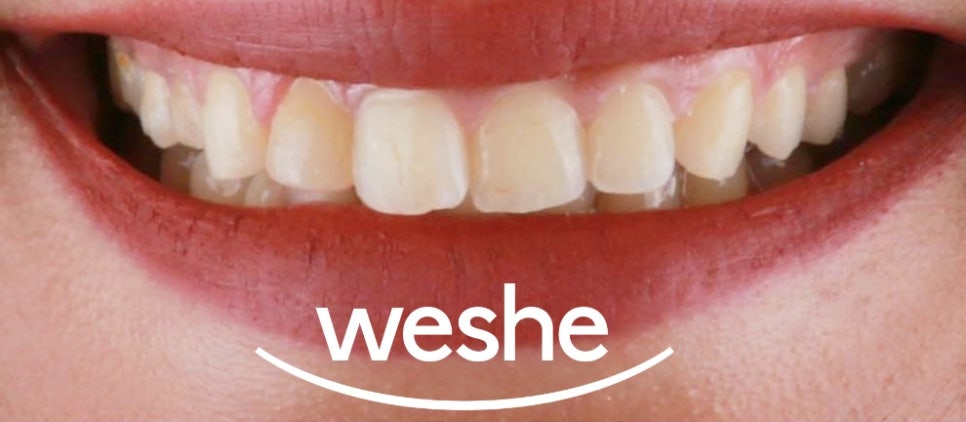
After checking the intraoral condition,
the arrangement of the teeth was somewhat irregular,
and the harmony of the front teeth was disrupted.
In addition, the overall shade was dark,
and the root tips of the teeth were slightly chipped,
or the shape and size were not well balanced.
After confirming this,
Maggok Station Dental Clinic was able to proceed with the following treatment process.
- Process
After taking X-rays to check the condition of the alveolar bone and whether there are any abnormalities in the roots,
we obtain intraoral photos and models and set the improvement goals.
After that, we review the design
(wax-up or digital mock-up).
With a pre-treatment mock model,
we check the ideal tooth contour and harmony with adjacent teeth,
and can reflect shape and color feedback together with the patient.
Next, tooth reduction is performed.
Only the enamel is selectively and thinly removed
to secure the necessary thickness for the restoration
while creating the proper space to prevent debonding.
After reduction, an intraoral scan is taken with an oral scanner,
and preparation begins for fabricating the laminate restoration on the scanned model.

After checking the shape and shade before bonding the restoration to the tooth surface,
it is attached with resin cement and fully cured with a light-curing unit.
At Maggok Station Dental Clinic,
after removing the remaining cement,
we explain that checking the bite to ensure stability is a process that can also lead to better long-term outcomes.
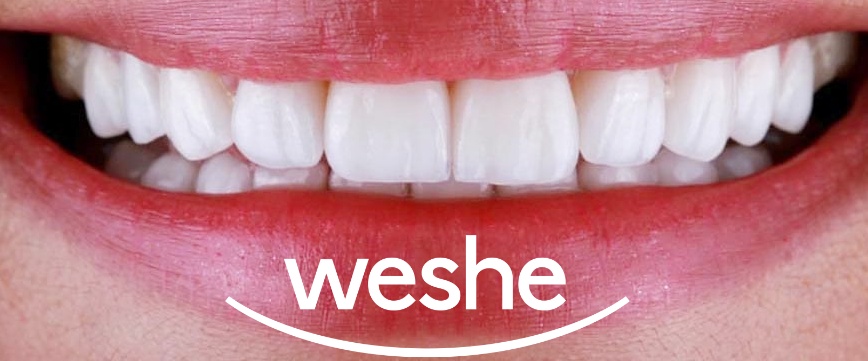
- Result Check
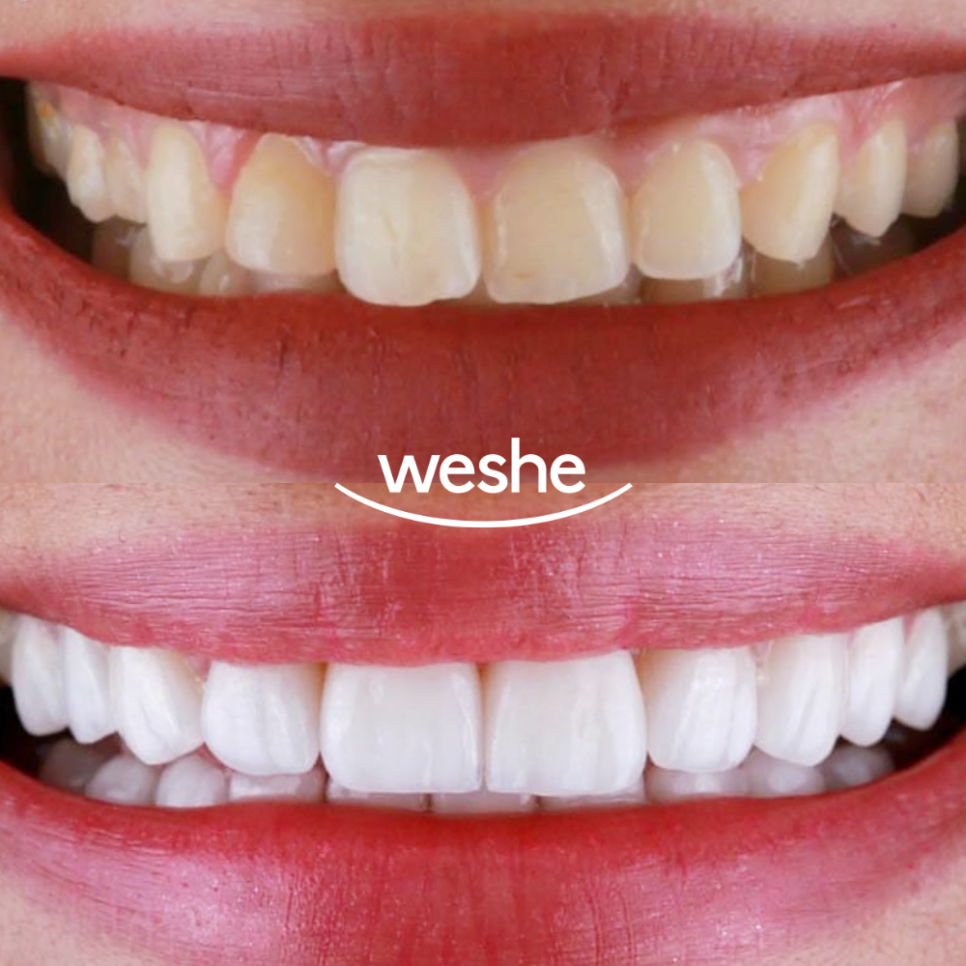
Comparing the before-and-after photos,
the imbalance of the front teeth and the slightly chipped tips are neatly gone,
and the shade and shape blend softly together to the point that they are almost indistinguishable from natural teeth.
Lastly,
I will explain the care instructions after laminate treatment at Maggok Station Dental Clinic.
- Post-Treatment Care Notes
- Be careful about early staining
For the first 1–2 days after the procedure, before the adhesive has fully cured,
try to avoid coffee, wine, and strongly staining foods as much as possible.
- Prevent physical damage
-
Avoid biting directly with the front teeth into hard or chewy foods.
-
Do not apply direct impact with fingernails, toothpicks, or similar objects.
- Oral hygiene management
-
Maintain cleanliness around the laminate with regular scaling and checkups.
-
If needed, manage with interdental brushes and mouthwash.
The topic introduced today was the treatment process for crooked front teeth with slightly chipped tips, using laminate restoration instead of orthodontics.
Through this case, I explained that improvement is possible with laminate even without orthodontics or full crowns, and I’ll end the post here.
I hope this was helpful for those who needed medical information related to this topic.
This was dentist Yeo Sang-ho from Maggok Station Dental Clinic.
Thank you for reading this long post 😊

Treatment period: 2025.04.12~2025.04.30