Hello, I’m Jae-hyung Park, the director of Wonjin Dental Clinic.
“I’d like to tidy up my slightly misaligned front teeth.”
The reason front teeth may appear rotated or misaligned can sometimes simply be an issue with their arrangement,
but in many cases, a slightly chipped or protruding tooth can also create an optical illusion.
Depending on the cause and the patient’s oral condition, partial orthodontic treatment may be necessary, while in other cases, improvement may be possible through restorative treatment alone.
Today, I will introduce the process of improving misaligned front teeth using only four minimal-preparation veneers, without orthodontic treatment, along with actual case materials.
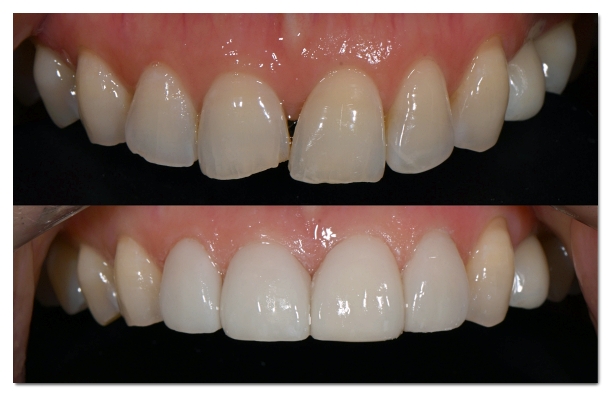
26.06.02 - 26.06.16
- Diagnosis
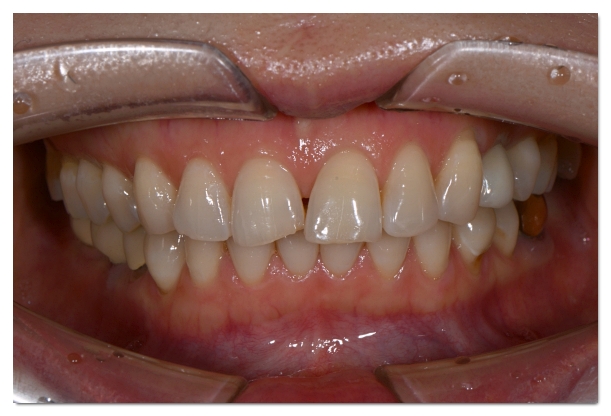
This shows the patient’s intraoral condition at the initial examination. (Treatment was provided by Dr. San-ha Lee.)
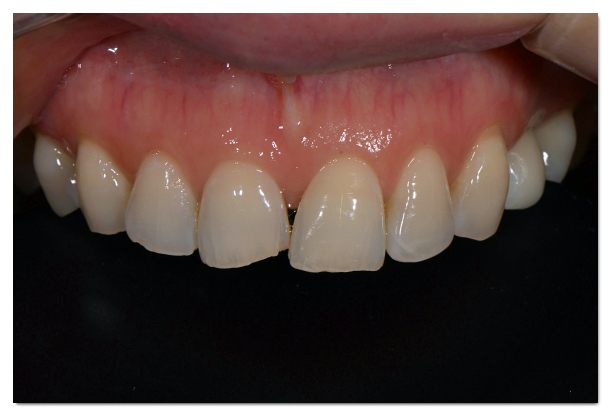
26.06.02
At first glance, it may look as though the issue is simply misaligned teeth, but a closer look reveals a combination of three problems.
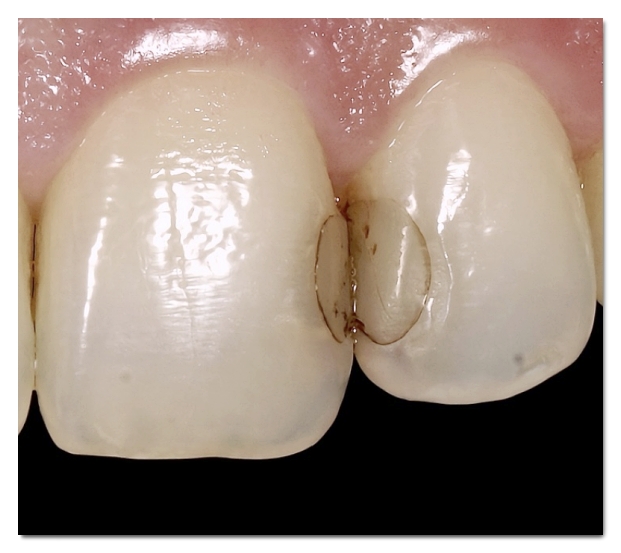
The left front tooth was slightly chipped at the edge, while the right front tooth was rotated and protruding.
In particular, the right front tooth had extended into the space belonging to the left front tooth.
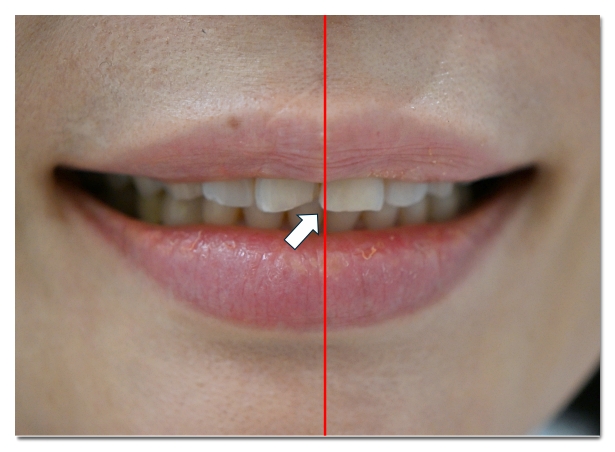
The white arrow in the photo above shows that the right front tooth has crossed over the midline.
When a tooth is chipped or protrudes and the angle at which it reflects light changes, it can appear to our eyes as though the tooth is rotated.
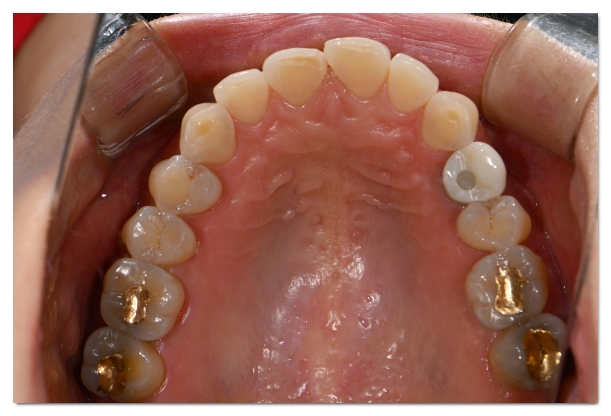
The right front tooth also protrudes farther forward in the photo above.
To address these combined issues, three main treatment approaches could be considered.
-
Partial orthodontic treatment + veneers
-
Partial orthodontic treatment + composite resin
-
Minimal-preparation veneers + gum contouring
Partial orthodontic treatment has the advantage of fundamentally correcting the position of the teeth themselves.
However, it requires a long treatment period of at least three months, which also increases the financial burden.
In addition, this patient had relatively strong anterior occlusion, or bite force.
When composite resin is applied to front teeth that receive strong occlusal forces, there is a high risk that it may chip or come off easily, and it may also discolor over time.
Therefore, I proposed combining minimal-preparation veneers, which can compensate for the disadvantages of orthodontic treatment and composite resin, with gum contouring to achieve tooth symmetry.
In general, veneers are recommended for six teeth, from canine to canine, to create an ideal aesthetic smile line.
Ultimately, however, according to the patient’s wishes, we established a treatment plan to improve the shape and alignment using only the four essential front teeth, without gum contouring.
- Minimal-Preparation Veneer Process
First, we analyze the shape and size of the teeth, as well as the midline.
Simply smoothing the protruding front surfaces could make the two front teeth asymmetrical in size.
Therefore, we first established a new virtual midline and carefully refined the area where the tooth had encroached, adjusting both sides to achieve symmetry.
If too much tooth structure is removed, the yellow dentin inside may show through.
Therefore, we proceeded in a way that preserved as much of the tooth structure as possible and requested clear color masking from the dental laboratory.
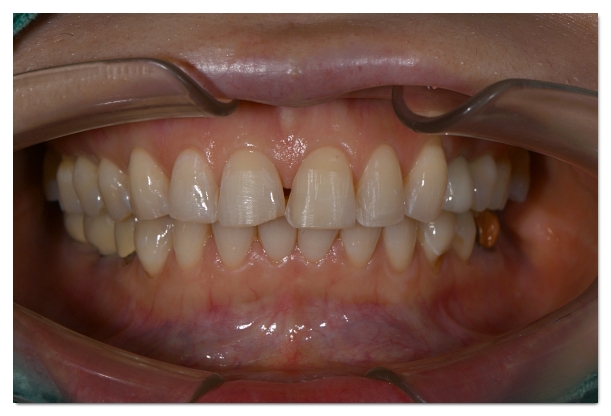
The photo above shows the tooth surfaces after minimal preparation. (26.06.02)
To minimize the amount of tooth reduction, we finely smoothed and refined the surfaces and the sharp incisal edges created by the chipping.
Once the tooth surfaces have been prepared in this way, the veneers can be bonded more securely.
Even after the restorations are completed, they are not bonded immediately.
An important process called a “try-in” is carried out before final bonding.
(It may be easiest to think of this as a testing process in which different shades of cement are tried to determine the final color of the veneers.)
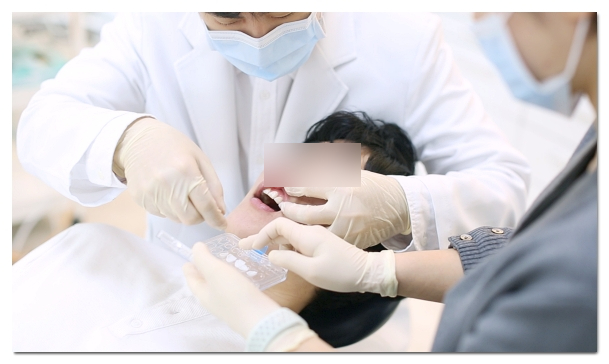
Because veneers are thin and somewhat translucent,
The final shade can vary completely depending not only on the color of the natural tooth underneath but also on the shade of cement used.
In this case, it was important for the veneers on the two front teeth to appear slightly brighter depending on the amount of tooth reduction.
However, if all four veneers were bonded using the same cement, only the two front teeth would appear more yellow.
Therefore, we adjusted the cement shade for the two front teeth to a lighter color so that the overall shade would look harmonious.
(We usually try two or three different shades to find the most harmonious tone.
Because veneers are not easy to remove once bonded, it is important to take the time to ensure that the patient is satisfied at the appointment.)
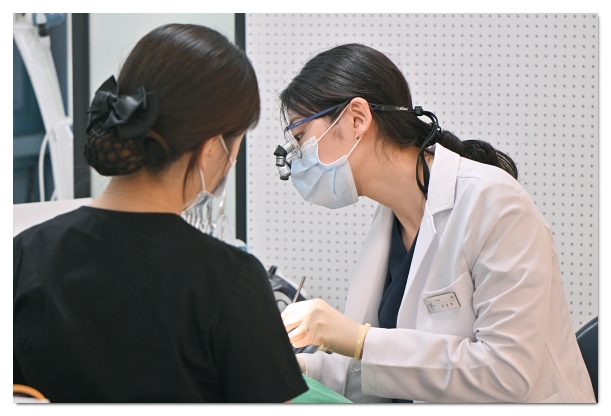
In fact, the lifespan of veneers can also vary depending on which cement is used.
Therefore, even though the material cost is higher, we make an effort to use products with strong bonding performance and good stability.
You can refer to the article below for more details about this topic^^
- Results
This shows the completed final restorations.
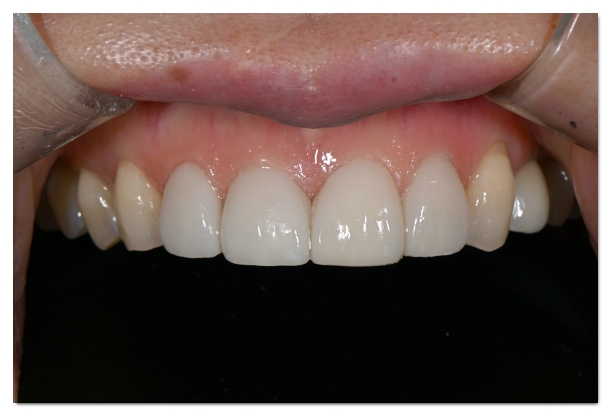
26.06.16
Considering the thin thickness of the restorations, we selected and applied a cement shade with the appropriate brightness for each tooth. This created a clear, natural color without a cloudy appearance.
Since the canines were not treated, we avoided making the color excessively bright, which could have created too much contrast.
It appears to have turned out well.
Nevertheless, because there is still some color contrast with the canines along the smile line, we decided to match the shades with professional tooth whitening at a later time.
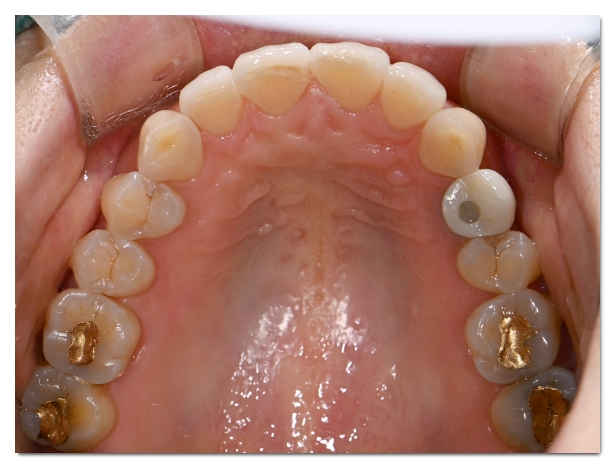
The misaligned and uneven front-tooth line in the photo above was naturally improved into a symmetrical arrangement. (26.06.16)
After bonding, we carefully check the occlusion, or bite.
Because the front teeth guide the jaw as it moves,
The forces must be distributed so that excessive pressure does not become concentrated on a particular tooth, helping prevent fractures of the restorations.
We also scheduled a follow-up examination one week later to adjust the subtle changes in the bite that may occur during use, and then completed the treatment.
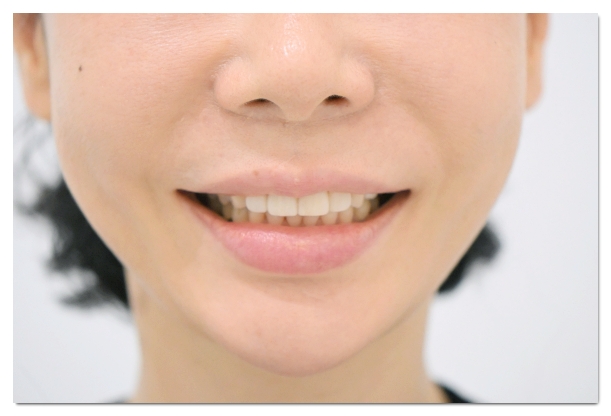
Compared with the first visit, the patient’s smile looked much more relaxed, and they smiled broadly. (26.06.16)
Ultimately, without excessively reducing the teeth,
we created the neat, bright, natural smile line the patient wanted.
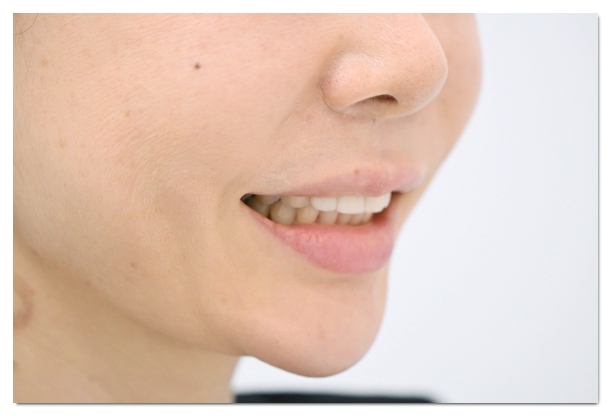
The shape and color also blend naturally with the natural teeth when viewed from the side. (26.06.16)
With veneers, accurately diagnosing the initial condition is important, but the lifespan and satisfaction with the treatment also depend on how carefully each detail is handled at every stage.
I hope today’s information was helpful in understanding the veneer treatment process.
Thank you. This has been Jae-hyung Park.