Hello.
A condition in which teeth are missing from birth is called congenital absence.
In particular, not the central incisor but the lateral incisor, that is, the lateral front tooth, is a tooth with a high frequency of congenital absence.
If the lateral incisor is missing, when the canine erupts it often shifts into the lateral incisor position, and the baby canine often does not fall out on time and remains in place.
A baby tooth that has not fallen out and remains like this is called a retained deciduous tooth.

25.03
A retained deciduous tooth does not necessarily have to be removed. Even though it is a baby tooth, if the root is firm, it is better to keep using it for as long as possible. However, because it is a baby tooth, it is vulnerable to wear and fracture, and in such cases, restoring the shape with a non-prep laminate is a good option.
25.03
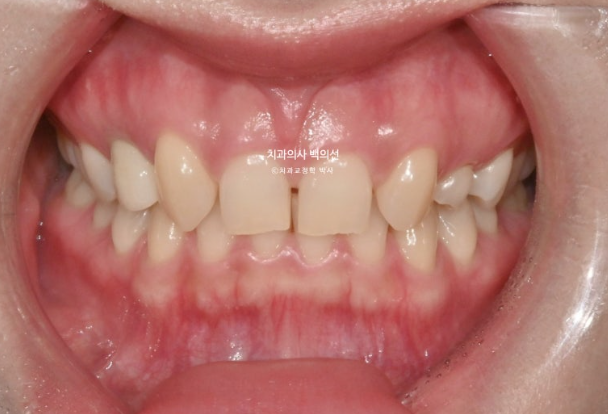
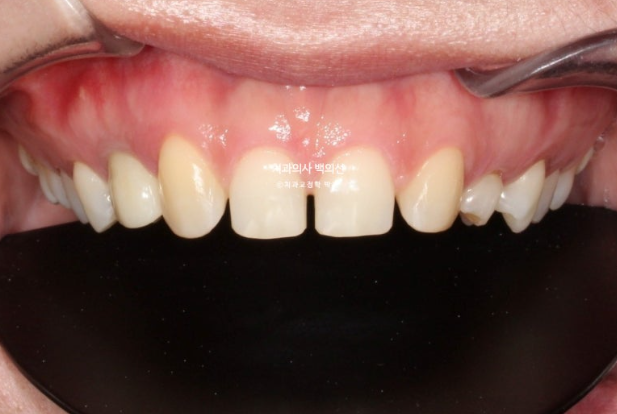
This is a patient who came in for Gelami treatment, a non-prep laminate.
This is a case where closing the gap between the front teeth is better handled with a non-prep laminate rather than orthodontic treatment.
However, because there is a deep bite, it is advisable to trim the thin worn-down edge at the tip before the non-prep laminate and slightly reduce the length.
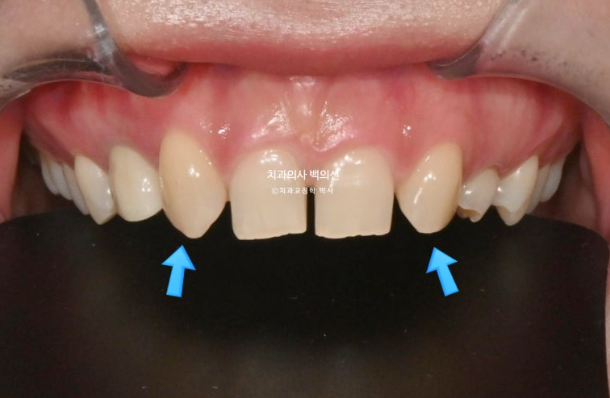
The blue arrow indicates the canine that has erupted into the space of the missing lateral incisor.
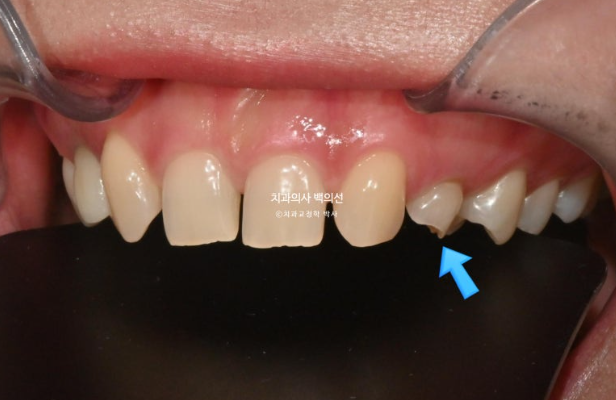
The blue arrow indicates a crown that was placed on a baby tooth long ago. The color is a bit awkward, but the condition of the prosthesis itself is not bad.
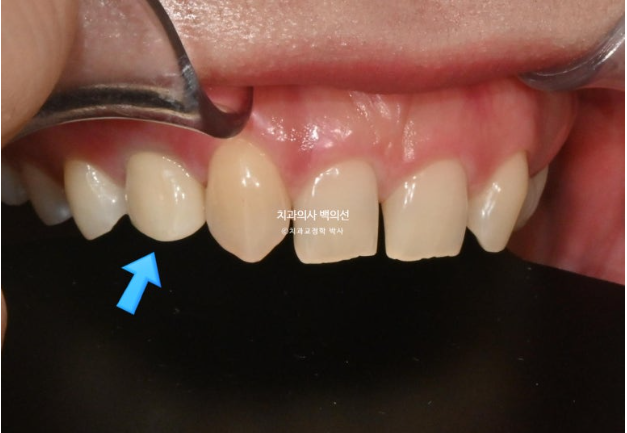
The retained canine on the other side is worn at the tip.
The treatment plan was to treat the four front teeth and one retained baby tooth on the left, for a total of five teeth, with non-prep laminate Gelami.
The baby tooth with the crown will be replaced later when the time comes, so it was not included in this treatment.
The key points in this treatment are two things.
Making the canines look like front teeth
Matching the brightness level between the unusually yellow and dark canines and the central incisors
The canine naturally has a higher gum line than the front teeth, a more pointed shape, and a curved, rounded front surface, so to make it look like a front tooth, the pointed part must be partially reduced.
To resolve the deep bite, the thin remaining edge of the front tooth tip and the pointed tip of the canine were trimmed.
After that, fitting was performed.
The time from the initial visit to fitting is 7 days.
Seven days later, during fitting, after attaching Gelami, the condition is temporarily reproduced by bonding it to the teeth with temporary resin material.
Photos were also taken while smiling, and after directly checking details such as the smile line and the height differences between the left and right sides, Gelami was made reflecting the patient's preferences. The time required to make Gelami is 10 days, so 17 days after the initial visit, the non-prep laminate was finally attached.

Canines are naturally darker than front teeth. Since non-prep laminate does not involve tooth reduction, the key is that it is very thin, in 0.n mm units, so the natural tooth color can show through. The shades of the front tooth and canine Gelami materials were made differently, and then the brightness of the adhesive resin before bonding was adjusted in a second step to finely control how much shows through. Only through this kind of detailed adjustment do the canine and front tooth colors connect naturally, making the canine indistinguishable.
If prep laminate were used, this process would not be necessary. Since the laminate thickness is secured by the removed tooth structure, the original tooth color would not show through, and the color would come out uniformly.
However, it would be a rather ordinary laminate without translucency.
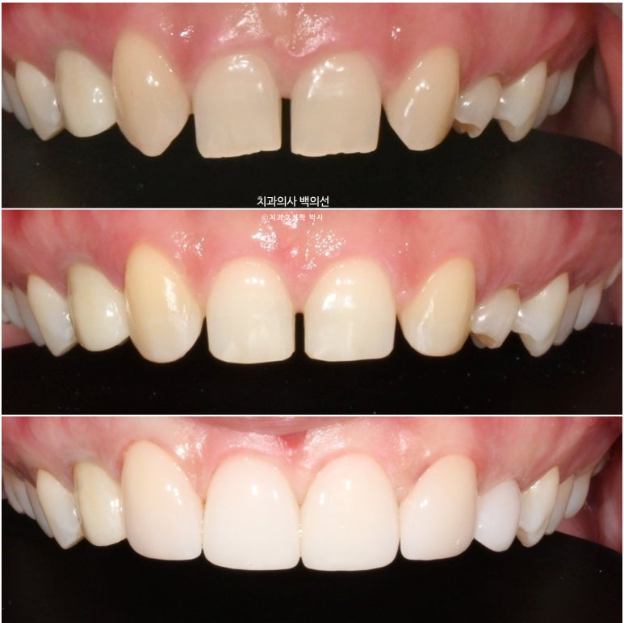
Let me explain by looking at the before-and-after photos.
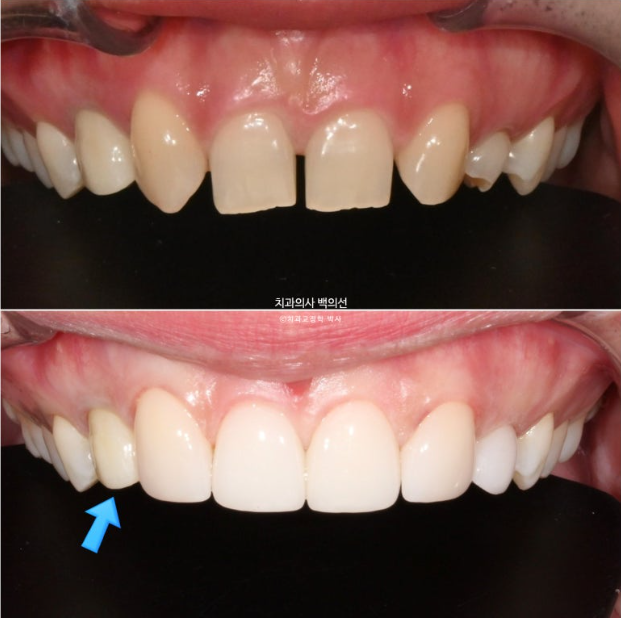
The tooth indicated by the blue arrow is an old crown, so the color does not match.
However, excluding the color, the prosthesis itself is in good condition, so it was decided that it would be replaced later, when the time comes, to match the color of Gelami.
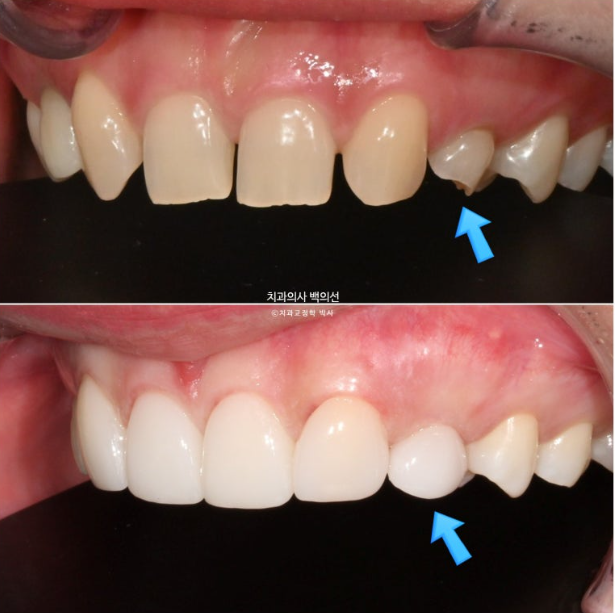
The retained baby tooth indicated by the blue arrow had its worn area restored with Gelami.
The translucency that subtly allows the natural tooth color to show through is what gives Gelami its natural look.
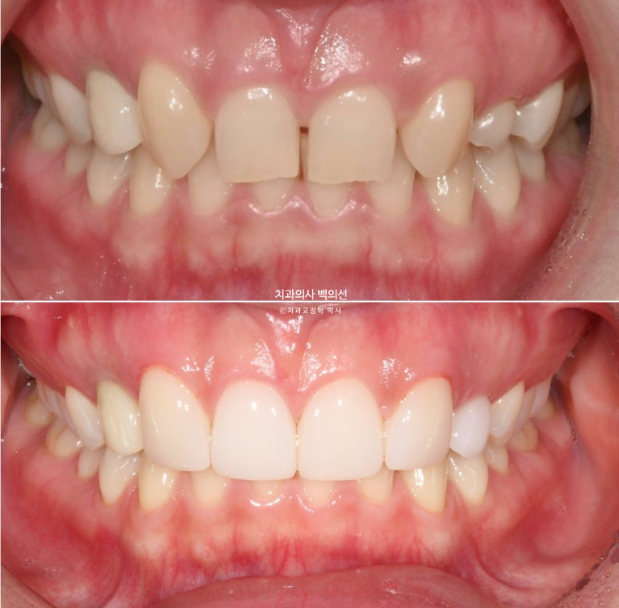
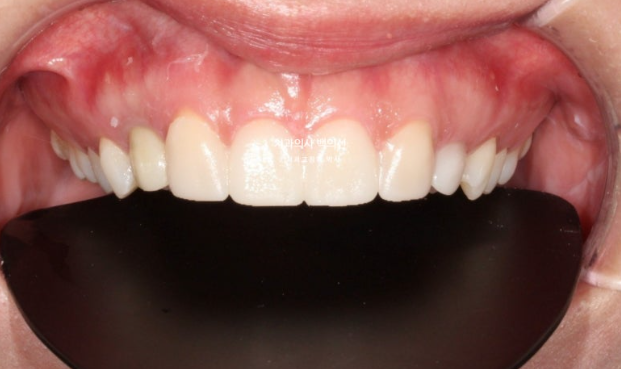
This is the before-and-after occlusion photo.
Now, let’s review the treatment process.
In order: initial visit - trimming the tip shape - Gelami attachment.
25.03
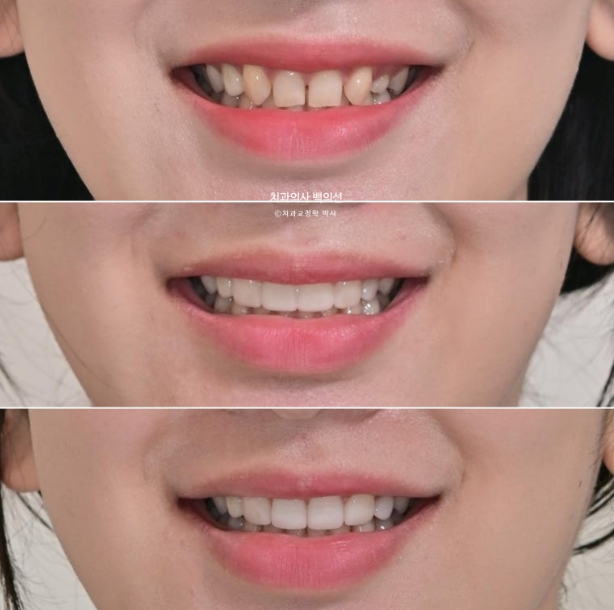
Let’s review the process with facial photos.
In order: initial visit - after fitting - after Gelami attachment.
25.03
I hope this was helpful for those considering non-prep laminate, and I will end today’s post here.